

It’s dark. It’s dirty. It’s grungy metal goodness.
Here’s a simple composition that we can bang out with just two layers (and a couple of adjustment layers). Lets get to it…
Grungy background? Check.

Awesome looking Aviano type? Check. Bump this text up to 297px in size, and make sure you set the color to #b9b8b8.

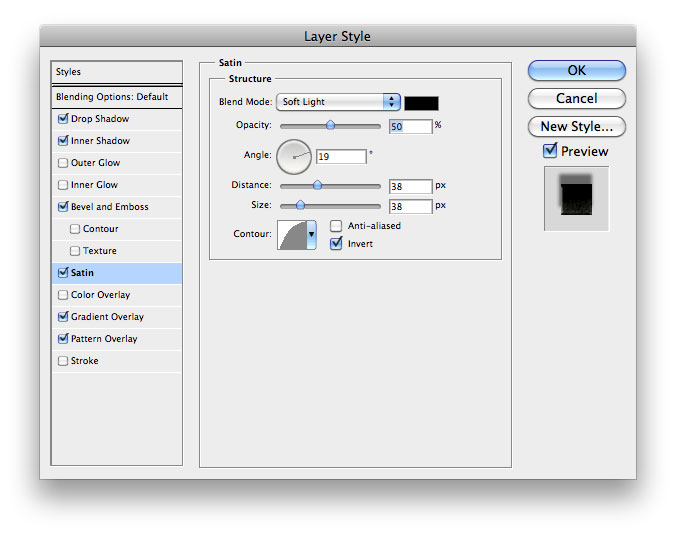
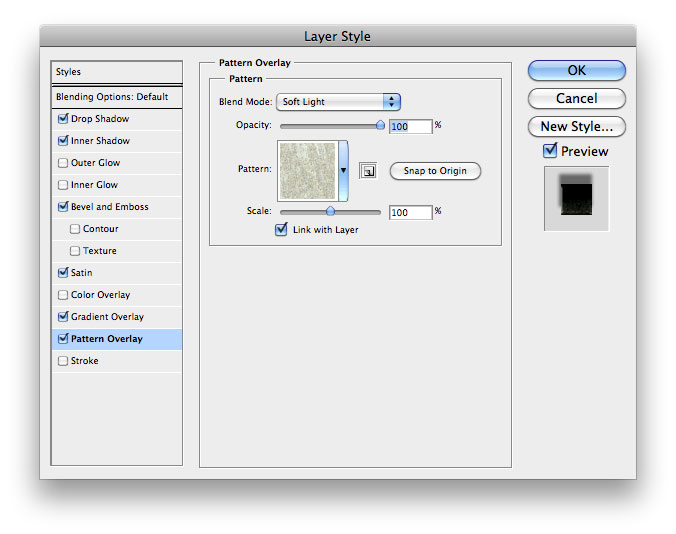
Here’s the fun part. The texture you see on the text is actually a stock Photoshop pattern that we’ll be using as a Pattern Overlay. In your Pattern Overlay effects window, click on the default pattern’s thumbnail to reveal a gallery of pattern presets. Click the small right arrow on the right of this window and then choose Rock Patterns in the resulting menu. Lots of patterns can be used here, but I chose the beige cement looking one for this effect. Now apply the remaining effects as shown:


That’s all there’s to it. But I think we can punch this up a bit more. Create a Color Balance and Curves adjustment layer by clicking on the half black & white circle at the bottom of your Layers palette. Now use the following settings:


Thanks for sharing this helpful tutorial!!
ReplyDelete