
mixingbrushes and layers
Step 1
To start with, open a new document in Photoshop with the dimensions 3508x4961 pixels and a resolution of 300 pixels/inch. Then create a gradient overlay for the background with the colours #778989 and #cbcfce and then angle the gradient at -61 degrees.
Step 2
Then using the custom brushes, you can download them here, with the colour #010207 (which is just off black) and setting the flow and opacity down a little you can start to build up something similar to the below image.
Step 3
With the custom brushes try to use these settings in the brushes toolbar with different brushes and at different sizes to help create a random effect so your brush doesn't look like a single stroke. Also because the brush is at a lower flow and opacity, if you go over a bit again with a new click it will get darker so you can build up an effect like mine.
Step 4
Now hide that layer and create a new layer. Then use some of the dot brushes and place them down where you want. Next erase them with a big eraser similar to the brush you used in the last step making sure the opacity and flow are about 50% so you can erase them softly over time to get the result as in the image.
Step 5
With about 3 different layers for different brushes, build up your base to look similar to this. Again experiment with the different brushes supplied and change the settings in the brush panel like shown in an earlier step and don't forget to erase over certain parts and around the edges to smooth things out.
Step 6
Don't be put off if you think that it looks odd, as the separate layers can do, as you can see in this image with only one layer showing. However all combined they create a nice effect with many different looks.
Step 7
For the lines I created a layer underneath all of the previous layers except the gradient background layer and used the pen tool to create one line at a time by following these steps:- 1: Select "Pen Tool", then make sure "Paths" is selected at the top (it is one of the buttons below "Edit" and "Image", just hover the mouse over until it says "Paths" and select that one).
- 2: On your new layer draw a line from the top left to the bottom right, adding a curve, then select "Paths", which is a tab next to your layers panel. Then make sure a round basic hard edged brush is selected as 15px in size. Now right click the path in the
- "Paths" section with the brush tool selected and click "Stroke Path", then tick the box "Stimulate pressure" and click "OK" and you should get the desired line.
- 3: Now with your other layers showing (but still only working on the lines layer) you can start filling in gaps with lines how you please and sometimes use "Stimulate Pressure" and sometimes not. Also remember to use different colours for your lines.

Step 8
By now your image should be looking similar to below. We can now add the face to the image.

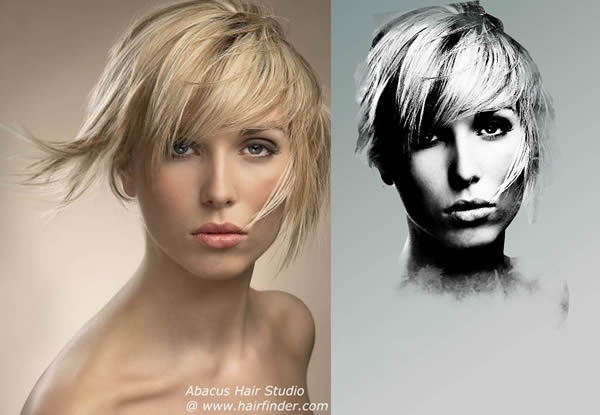
Step 9
This is the before and after shot of how the face should look. I simply found a face on Google images by searching for "model face". This one is supplied on the PSD file which can be downloaded too.All I did here was cut around the face with the "Magnetic Lasso Tool" and then "Desaturate" it and adjust the "Curves" so you can see some real contrast in the shadows on her face.
Step 10
Now we place the face over the desired area (I rotated the face slightly) and with several new layers on top we build up over her face using the same techniques for the brushes from earlier trying to match the colours to the shades surrounding her face. The "Ink Dropper" tool can help to choose the colours from her face.
Step 11
Almost done now. Simply add some brush strokes from her eye on a new layer in the colour red and set it to "Multiply" in the layer properties. When happy with it duplicate the layer and set that to multiply to darken the effect.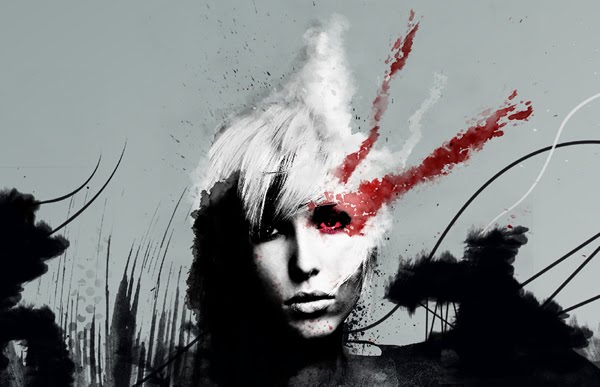
Conclusion
There"s your final image minus the text. Thank you.


