
Colored Eagle Manipulation in Photoshop >> Effect
Skill : Intermeddiate
In this tutorial you will learn how to create colorful effect in Photoshop.
We will use few stock images and shapes. We will go through the process how to add to an object light effects using basic Adobe Photoshop tools. Photoshop techniques that you’ll learn in this tutorial, you can use in creation of advertising posters or creating your own stylish photo effect.

Stocks Used
Step 1 – Creating a new file
First create a new layer with w: 2560px and h:1600px with color:000000 (black),name this layer as “Background”.
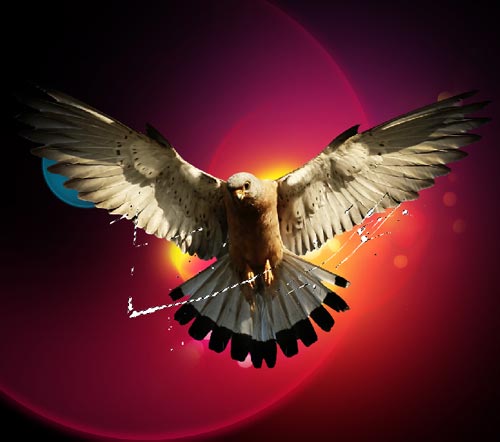
Step 2 – Place the image of bird
Open the image of bird and place in your document. Place the image in the middle of the document.Name this layer “Eagle”.

Step 3 – Preparing to the main effect
- Create a new
folder below the eagle image and name this folder “Lights effects”.- We’ll create the main effect of this tutorial. Now choose brush tool (press b) with a soft round brush color e20000 and 1000px size paint in the middle of your document and use hard light to blend mode.
- Create a new layer below this layer and again use a soft round brush but now with 500px size and use color white.
- See the images below.


Step 4 – Add more color
Add more color to your
document.Just create a new layer and use a soft round brush with 1000px color 832380 and place like the example below.

Step 5 – Creating circular shapes
We need more effects. Let’s create some circular shapes using the brush tool
(b).- Use a hard round brush with different sizes and colors to do this.
- After creating the circle press ctrl and click on the circle with the layer to create a circular selection.
- In a separate layer add a stroke (Edit >Stroke) with a lighter color and 4px or 5px. Return to the first circle shape and add a Filter>Blur>Gaussian blur, with 7px or 8px.
- Now, in the stroke layer add the same effect but now with 3px or 4px blur.
- Then marge both layers together. I created more circles and erased some areas.
- Look the images below.


Step 6 – Using liquify filter
Still in the lights effects folder create a new layer and use a yellow brush (b) then apply Filter>Liquify, and use forward warp tool to create a distorted shape like images bellow.
Step 7 – Adding more stock
Now I used a image of
stock to add more lights effects
(http://www.megaupload.com/?d=mmmm6fkg). Resize the image and change the
layer mode to screen. Mask or erase some areas if necessary.

Step 8 – Creating splatter effect
Create a new layer
above the eagle image then use any splatter brush to create this
splatter effect.- With your splatter brush paint over the eagle image, then press ctrl+click in this splatter layer to load a selection.
- Go to eagle image and press ctrl+c to cut and ctrl+v to paste this selection in a new layer.
- Now you can delete the original splatter layer, we do not need this layer.


Step 9 – Creating circular line shape
Create another
layer above the eagle image. I created a circular line shape to do this
simple effect. You can download this pack containing the shapes here
(http://www.megaupload.com/?d=73gm7gs1).Now, just draw a shape like the image below.
- I use color #ff006c with overlay mode and 15% opacity.


Step 10 – Creating abstracts shapes
- Create another
layer above lights effects folder.- Time to create some abstracts shapes.
- In this step I used some renders stock then I simply use liquify tool to distort the renders (Filter>Liquify>Forward warp tool).
- I don’t remember where I found the stock renders, but you can easily find these stock in Devianart. See below how were the renders after liquify tool.
- Use hue saturation (ctrl+u) to adjust the colors if necessary and burn tool (o) to darken the colors.

Step 11 – Apply a light effect on the wings
- Now I create another layer above the eagle image.- I will apply a light effect on the wings.
- To do this i draw i line with pen tool (p) and apply a layer style as you can see below, use outer glow with color #ab023a and let others settings standard.
- Then to finish the effect i apply a Filter>Blur>Motion blur, angle 0 and 10px or 15 px.
- See image below as reference.
- Do the same in the other wing.


Step 12 – Creating more lines
- Create another layer and use pen tool
(p) again to create more lines, but this time without layer style
applied.- Just use white color and choose simulate pressure.
- Choose a hard round brush 2px then press (p), right click select simulate pressure and hit OK.

Step 13 – Creating pink circles
I create in a new layer more pink circles and then I apply a Gaussian blur effect
(Filter>Blur>Gaussian blur) with 5px.- Then I have grouped all this circles together.
- Use soft light to layer mode and reduce the opacity to 20% or 15%.
- See the image below again.

Step 14 – Adding typography
I just use Illustrator to create a simple typography.- Use type tool in Illustrator and add Effect>3d>Extrude & bevel and use the standard settings as you can see below.


Step 15 – Last step – Adding additional effects
For
the last step feel free to create additional shapes and effects. I just
paint some blue small dots with brush tool (b) and also I create some
triangular shapes and I put diagonal lines to finish this job.Thats all folks, hope you all enjoy it.
Final Results

No comments:
Post a Comment