Step 1
First, find any photo which you like to use for this lesson and open it in Photoshop.

Step 2
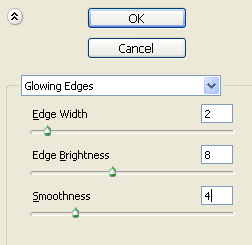
Duplicate now your layer (CTRL + J) and choose Filter > Stylize > Glowing Edges. After that, make the adjustments as follow:
Step 3
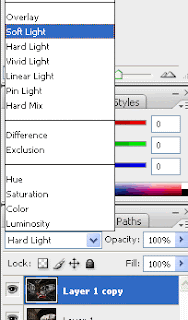
Set the blending mode to Soft Light and after that choose Layer > Merge Down.
Step 4
Choose now Image > Adjustments > Auto Color and duplicate layer once again.
Step 5
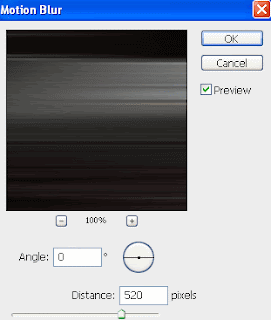
Choose now Filter > Blur > Motion Blur and make the adjustments as follow:
Step 6
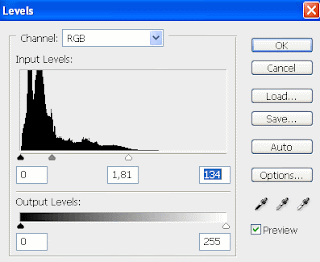
Go now to Image > Adjustments > Levels and make the adjustments as follow:
Step 7
Set now the blending mode to Vivid Light.
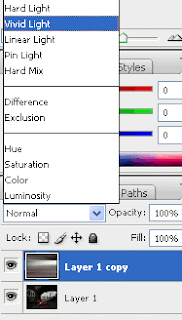
You should now have something like below.

Congrats !!
LINK

No comments:
Post a Comment